By default, those employees listed with admin access will receive visitor approval notifications. To also send this approval notification to the visitor's host, follow the steps below.
How to enable 'Allow host to approve visitors'
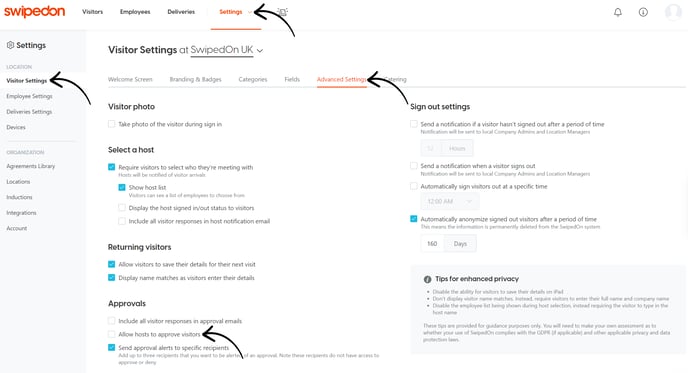
To enable this setting navigate to the 'Settings' > 'Visitor Settings'> 'Advanced Settings' view of the SwipedOn web dashboard and once the 'Require visitors to select who they're meeting with' setting has been enabled, the 'Allow host to approve visitors' checkbox will no longer be greyed out and can be checked to enable this option.

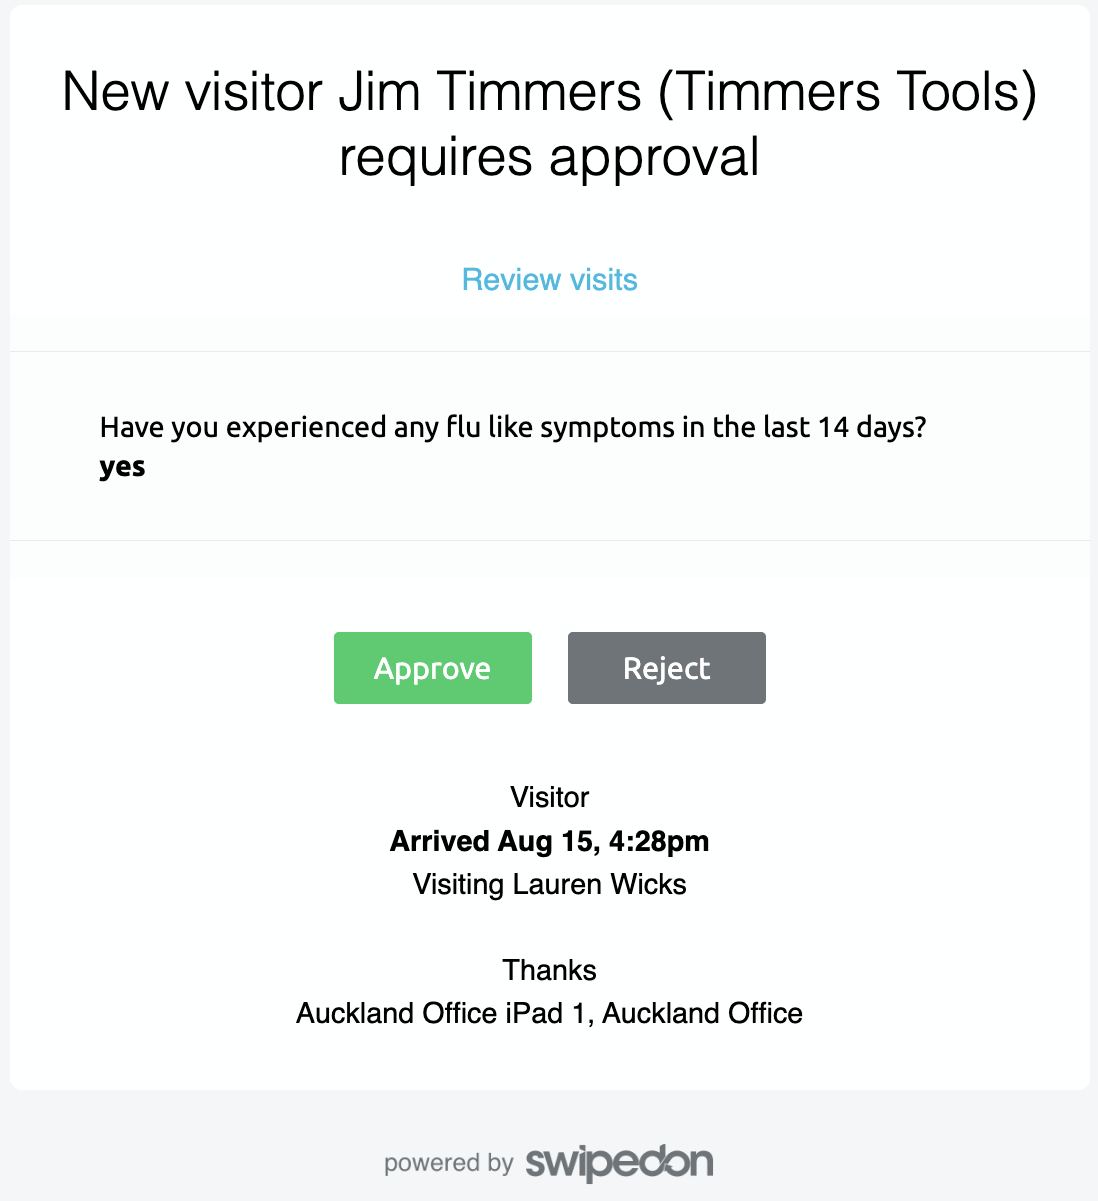
The host associated with the visitor will now also receive the approval notification with the ability to select 'approve' or 'reject' via the email notification.

If approved, the host will then receive the usual email notification of their visitors' arrival, and if enabled, an ID label will then print. If rejected, the host will need to notify the visitor that they have not been approved for entry.
To review the visitor fields that are enabled or to make any adjustments to these fields, head over to the 'Visitor Fields' view. Check out our support article on Visitor Fields for more information on this feature.
